Building a RAG from scratch
In this post, I’ll kick off a series of posts where I’ll be diving deep into Retrieval Augmented Generation (RAG), covering both the theory and building one from scratch.
I’ll start by explaining what it is, what its main components are, and building a simple implementation. Over the next the few posts in the series, I’ll explain additional RAG techniques and iterate over the implementation. I will try to keep a very simple approach and do my best to always provide practical advice.
What is Retrieval Augmented Generation?
Retrieval Augmented Generation (RAG) is a technique that dynamically fetches relevant information from external knowledge bases and adds it as part of the context sent to an LLM. The underlying goal is for the LLM to use this added information to generate a response instead of purely using its own parametric data (the data that it learnt during its training), increasing the chances of generating a relevant response for the user.
At its core, a step-by-step RAG workflow looks like:
- Taking a user’s query and finding relevant documents from a pre-populated knowledge base
- Providing these documents as context to the LLM
- Having the LLM generate a response based on both its training and the retrieved information
- Send the response back to the user
Why is it relevant?
Even as AI continues to move forward and more organizations release increasingly capable LLMs, there are a number of underlying limitations in the technology that remain yet to be solved. Some of these are significant and limit the real applicability of LLMs for many use cases. Some examples are the lack of real understanding of the physical world, their non-deterministic behavior, their lack of long-term memory, etc. While some of these are inherent to the technology and cannot be worked around, others can be addressed with the right architectural patterns.
RAG specifically tackles three critical limitations:
- Knowledge cutoff: LLMs are frozen in time at their training date. They don’t know about recent events, updated documentation, or your company’s latest quarterly results. RAG bridges this gap by feeding them current information.
- Private data: Your organization’s internal documents, customer data, and proprietary information most likely were never part of the LLM’s training (or at least, they shouldn’t). RAG allows you to leverage the reasoning capabilities of LLMs while keeping your data private and secure.
- Hallucinations: When LLMs don’t know something, they can make things up, confidently presenting false information as fact. By grounding responses in retrieved documents, RAG can reduce hallucinations significantly.
RAG is becoming increasingly critical as AI gets integrated more ubiquitously throughout organizations. The main reason is simple: AI solutions need the right context to operate well. Would it make sense to have an AI agent that answers customer inquiries without knowing who the customer is, their purchase history, or what their specific problem is?
The concept of “context engineering” has risen as a potential solution to many of the above listed limitations, and RAG is one of the pieces within it.
The Core Components of RAG
At a high level, every RAG system consists of two main phases: indexing and retrieval + generation. Let’s break down what happens in each phase and the components involved.
Document Indexing
This is where we prepare our knowledge base and optimize it for efficient retrieval, before any user queries come in. It consists of several individual steps:
Document Loading: First, we need to extract documents from their original sources (PDFs, web pages, wikis, databases, APIs) and convert them into a useful format for the following steps. This step is crucial because we cannot go back to the original sources during the retrieval phase, as everything needs to be preprocessed and ready for fast searches.

Chunking: Large documents are split into smaller pieces that are optimized for embedding and retrieval, and that can fit into the LLM’s context window. This is an extremely important step that requires careful consideration, not only from a chunk size perspective (chunk too small and you lose context; chunk too large and you dilute relevance), but also about how you split your documents in a way that preserves the structure of the original document.
Embedding: Each chunk is then converted into a numerical vector representation that captures its semantic meaning using an embedding model. Here you will need to choose between sparse and dense embeddings, each with their own advantages. Dense embeddings capture semantic similarity well, while sparse embeddings are better for exact keyword matching.
Vector Storage: These embeddings are stored alongside their corresponding chunks in a specialized database optimized for similarity search. Modern vector databases (like Pinecone, Weaviate, or Chroma) are designed specifically for this purpose, offering fast similarity searches and metadata filtering capabilities.
Retrieval + Generation
This happens in real-time when a user asks a question:
User Query Embedding: The user’s question is sent to the same embedding model used in the embedding phase and converted into the same vector space as our previously processed documents. You cannot use different embedding models for indexing and querying, as most likely different models will represent the semantics of your chunks differently, making the similarity search unreliable.

Similarity Search: We find the most relevant document chunks by comparing vector similarities. This is typically done using cosine similarity or dot product. The search can be purely semantic, but hybrid approaches that combine semantic search with keyword search often perform better.
Context Assembly: The retrieved chunks are formatted and combined with the user’s query. This step involves deciding how many chunks to retrieve, how to rank them, and how to present them to the LLM in a way that maximizes the quality of the response. Response Generation: The LLM generates a response based on both the query and the retrieved context. For this step to work properly, you need to instruct the LLM on how to use the retrieved information and what to do when the context doesn’t contain relevant information.

It’s worth noting that the steps above represent the simplest approach for a RAG at a high level. As with many things, there are multiple ways to implement each step based on your needs. For example, it’s usually advised to complement similarity search with hybrid, metadata-based filtering. Over the next few posts I will implement more advanced techniques and explain their advantages and disadvantages.
Building a RAG
Let’s start building a simple RAG. I’ll build it component by component, each one building on top of each other. I will try to provide some practical considerations along the way,
I will use python and will limit the number of external dependencies as much as it is reasonably possible. As the series progresses and I explain additional techniques, I’ll include external libraries as needed.
Document Indexing
Starting with the Document Indexing section of the RAG workflow, our first task is to extract the data from their sources. In this case, my source is a very simple txt file that is 150 lines long and is line-separated. More importantly, it contains facts about cats. The simplicity of this file will serve the purpose of helping us start quickly and easily.
Shoutout to Xuan-Son Nguyen who made this file available, but also made a great blog post explaining what RAG is and also building one from scratch. Xuan Son’s post inspired some of the sections of this blog. Go and follow him on Hugging Face!
Document loading
To start things easily, I will download the txt file locally, and then load it into a list.
dataset = []

with open('datasets/cat-facts.txt', 'r') as file:
    dataset = file.readlines()
    print(f'Loaded {len(dataset)} lines.')
This gives us the output:
Loaded 150 lines.
Let’s take a look at the file we just loaded:
print(dataset[:5])
['On average, cats spend 2/3 of every day sleeping. That means a nine-year-old cat has been awake for only three years of its life.\n',
'Unlike dogs, cats do not have a sweet tooth. Scientists believe this is due to a mutation in a key taste receptor.\n',
'When a cat chases its prey, it keeps its head level. Dogs and humans bob their heads up and down.\n',
'The technical term for a cat’s hairball is a “bezoar.”\n',
'A group of cats is called a “clowder.”\n']
Chunking
We can see that the content contains facts about cats, with each fact separated by a new line. This means the easiest approach for chunking would be to treat each line as a separate chunk, allowing us to skip building complex text-splitting logic. This chunking strategy is sometimes called Naive chunking.
While this will work for this very simple implementation, it’s important to understand that is often a terrible choice for real-world applications.
The reason is that human language is often more complex and nuanced than simple line breaks can capture. In real documents, important information frequently spans multiple sentences or paragraphs. A single concept might be explained across several lines, with context building progressively. When you chunk by lines, you risk breaking these natural information units apart, losing crucial context that helps the LLM understand and accurately respond to queries.
Consider a technical document explaining how to troubleshoot a software issue. The problem description might be on one line, the symptoms on the next few lines, and the solution steps scattered across multiple paragraphs. Naive chunking would separate these related pieces of information into different chunks, making it nearly impossible for the retrieval system to find all the relevant context needed to provide a complete answer.
Chunking Techniques
There are multiple chunking strategies that can work around this limitations. To name a few:
- Recursive chunking: attempts to split text at natural boundaries (like paragraphs, then sentences, then words) until chunks reach the desired size, preserving hierarchical document structure.
- Semantic chunking: goes further by using NLP techniques to identify topic boundaries and group related sentences together, ensuring that chunks contain coherent, self-contained ideas.
- Structure-based chunking: leverages document formatting (headers, sections, lists) to create chunks that respect the author’s intended organization.
- Contextual Chunking: in some cases, you may need to go beyond just splitting text and actually rewrite chunks entirely using LLMs. This approach introduced by Anthropic, involves having an LLM rewrite each chunk to include relevant context from the surrounding document. For example, a chunk that simply says ‘The solution involves three steps’ might be rewritten as ‘To resolve database connection timeout errors in PostgreSQL, the solution involves three steps.’ This technique significantly improves retrieval accuracy by making chunks more self-contained and searchable, though it comes with additional computational costs during the indexing phase.
Let’s visually see some chunking strategies:
But what if we need to handle those types of multi-modality data?
A common approach is to generate detailed textual descriptions that capture both content and context, and then store a reference to the original object alongside the chunk.
Embeddings
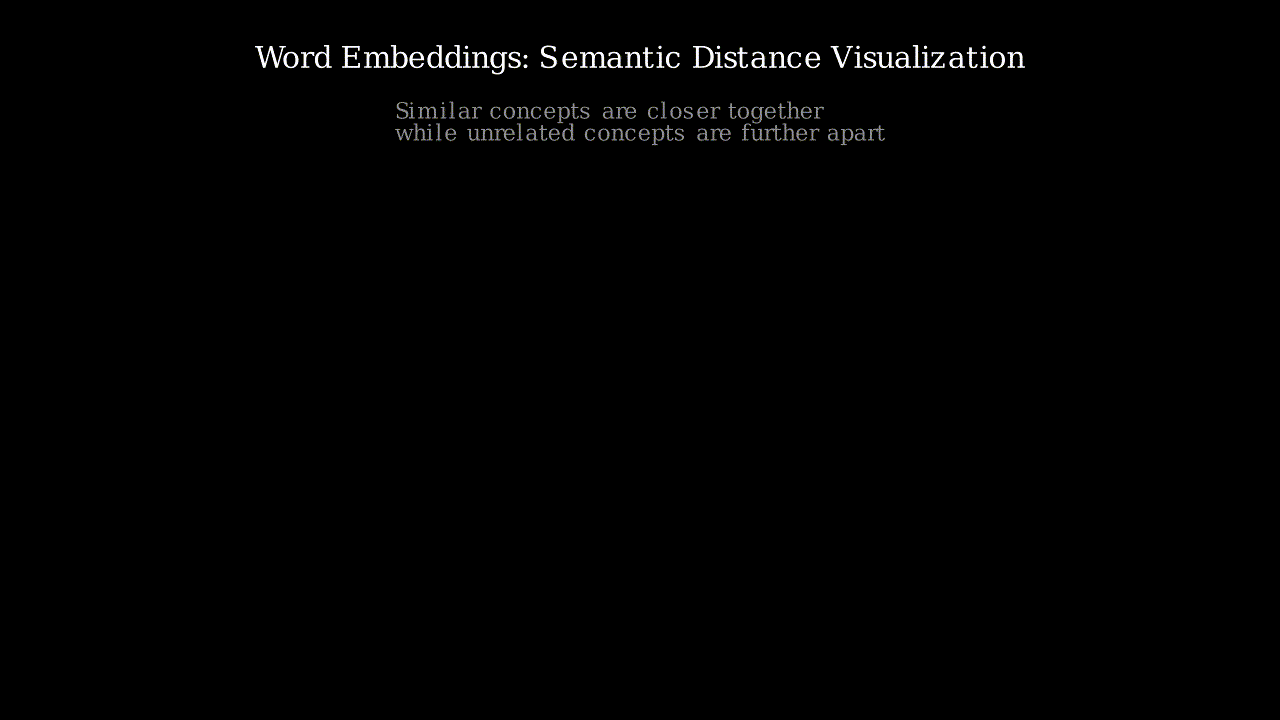
Now that we have our chunks, we need to convert them into embeddings. As I mentioned before, embeddings are numerical representations that encode their semantic meaning. This takes the form of multi-dimensional vectors, with the number of dimensions depending on the embedding model.
The magic thing is that if we take these vectors and represent them in a multi-dimensional space, we will find that concepts that are semantically similar will be “close” within this space, and concepts that are semantically different will be far away.
It’s a lot easier to understand this concept if we visualize it in 3D:
We can use the cosine similarity between the vectors to calculate its distance, meaning similar vectors will have a cosine similarity closer to 1, and different ones will have a value closer to 0. We will explore this in more detail later in this post.
Embeddings aren’t something new or made specifically for RAGs. They are a fundamental part of LLMs and have been used in NLP for a long while. You will find them powering recommendation engines, search systems, and many other applications that need to understand semantic similarity.
Dense vs Sparse Embeddings
There are two main types of embeddings to choose from, each with distinct advantages:
- Dense embeddings (like those from common text-embedding models) represent text as vectors where every dimension has a value. These excel at capturing semantic similarity - they understand that “car” and “automobile” are related concepts, even if they share no common letters. Dense embeddings are particularly good at handling synonyms, context, and conceptual relationships.
- Sparse embeddings (like BM25 or TF-IDF) create vectors where most dimensions are zero, with non-zero values only for terms that actually appear in the text. These are excellent for exact keyword matching and perform well when users search for specific technical terms, proper names, or exact phrases.
For this simple implementation, I’ll use dense embeddings, and I’ll be using OpenAI’s text-embedding-3-large model. This means we will need to use an additional library, openai .
Let’s see how the implementation looks like:
from openai import OpenAI
client = OpenAI()

EMBEDDINGS_MODEL = 'text-embedding-3-large'

EMBEDDINGS = []

# helper function to embed a single chunk
def generate_embeddings(chunk):
    """generates a vector embedding from a chunk"""
    embedding = client.embeddings.create(model=EMBEDDINGS_MODEL, input=chunk).data[0].embedding
    EMBEDDINGS.append((chunk, embedding))
We will use a helper function that will return a tuple that contains both the original chunk and its embedded vector representation.
Let’s generate embeddings for all of our chunks:
for i, chunk in enumerate(dataset):
    generate_embeddings(chunk)
    print(f'Generated embedding for chunk # {i+1}/{len(dataset)}')

print(f'\nGenerated {len(EMBEDDINGS)} embeddings')
print(f'Each embedding has {len(EMBEDDINGS[0][1])} dimensions')
This will output:
Generated embedding for chunk # 1/150
Generated embedding for chunk # 2/150
# ... (output trimmed)
Generated embedding for chunk # 149/150
Generated embedding for chunk # 150/150

Generated 150 embeddings
Each embedding has 3072 dimensions
Important: Remember that you must use the same embedding model for both indexing your documents and embedding user queries. Different models represent semantics differently, so mixing them will make your similarity searches unreliable.
This is what a single vector looks like:
# Showing only the first few dimensions of a single vector
print(EMBEDDINGS[0][1][:10])
[-0.005667881108820438, -0.008643814362585545, -0.01849456876516342, -0.038006752729415894, 0.028753552585840225, -0.0231566671282053, 0.015500886365771294, 0.008661563508212566, 0.0036237759049981833, 0.00934786256402731]
Let me show you a trick that I think will help a lot to understand the relationship on the resulting vectors a lot easier. Since this vectors have 3072, that’s 3069 dimensions too many for humans to understand! But what if we reduce the dimensions of the vectors to 3, using common dimensionality reduction techniques such as PCA so that we can visualize the points in 3D and explore them?
To do so, I’ll use PCA’s implementation from sklearn and will use plotly to create the visualization:
import numpy as np
import plotly.express as px
from sklearn.decomposition import PCA

def plot_vector_embeddings_in_3D(EMBEDDINGS):
    """Creates and displays a figure that includes the vector embeddings calculated"""
    # lets extract the text and the vector embeddings
    text = [embedding[0] for embedding in EMBEDDINGS]
    vectors = np.array([embedding[1] for embedding in EMBEDDINGS])

    # Apply PCA to reduce to 3D
    pca = PCA(n_components=3, random_state=42)
    vectors_3D = pca.fit_transform(vectors)

    # Create 3D plot
    fig = px.scatter_3d(
        x=vectors_3D[:, 0],
        y=vectors_3D[:, 1],
        z=vectors_3D[:, 2]
    )

    # Lets add mouse over text
    fig.update_traces(
        hovertemplate='<b>%{customdata}</b>',
        customdata=text
    )

    fig.show()
I’ll run this with just 25 vectors, so that it doesnt get too cluttered:
plot_vector_embeddings_in_3D(EMBEDDINGS[:25])
Let’s see how it looks like on this interactive figure.
You can mouse over the points to see how similar concepts are clustered together. For example there is a cluster of 2 points talking about “millions of cats in the world” (close to x=0.2, y=-0.2 and z=-0.2), there is another cluster talking about cat’s jumping abilities (close to x=-0.4, y=0.1 z=0.3), etc.
Vector Storage
For this very simplistic implementation, I won’t be using a vector database, but rather I will store everything in a simple list structure. This has the advantage that we can build the search algorithm on our own and understand exactly what’s happening under the hood.
However, it’s important to understand that this approach only work for demonstration purposes and this approach doesn’t scale for production workloads. For this, most likely you will want to use specialized vector databases like Pinecone, Chroma, or PostgreSQL with the pgvector extension. I’ll dive deep into this topic in the future.
Adding Metadata
That said, we can improve the way we store our chunks by adding metadata to them. These types of fields can store very useful information (such as document source, document path, creation date, author, document type, etc) and are required for more advanced retrieval techniques, such as hybrid search. This allows you to not only search based off the vector distance, but also filter the results based on additional fields that are relevant (for example, only retrieving recent documents, or chunks that belong to a specific product).
Let’s expand our embedding function so that it now includes metadata:
CHUNKS_WITH_METADATA = []

def generate_embeddings_with_metadata(chunk, source_file, chunk_index):
    """Generates a vector embedding from a chunk including medatadata"""
    embedding = client.embeddings.create(model=EMBEDDINGS_MODEL, input=chunk).data[0].embedding

    metadata = {
        'source': source_file,
        'chunk_index': chunk_index,
        'chunk_length': len(chunk),
        'chunk_type': 'fact'  # since we know these are cat facts
    }

    CHUNKS_WITH_METADATA.append({
        'content': chunk,
        'embedding': embedding,
        'metadata': metadata
    })
We will now need to also re-do our chunks with this updated format:
# Generate embeddings with metadata
for i, chunk in enumerate(dataset):
    clean_chunk = chunk.strip()
    generate_embeddings_with_metadata(clean_chunk, 'cat-facts.txt', i)
    print(f'Generated embedding for chunk # {i+1}/{len(dataset)}')
Now each chunk is stored with its content, embedding, and useful metadata that we can use for filtering during retrieval.
Retrieval + Generation
Now that we have our indexed knowledge base, let’s implement the retrieval and generation components that will handle user queries in real-time.
Query Embedding
When a user asks a question, we need to convert it into the same vector space as our indexed chunks:
def embed_query(query):
    """Convert user query into embedding using the same model as indexing"""
    embedding = client.embeddings.create(model=EMBEDDINGS_MODEL, input=query).data[0].embedding
    return embedding
Similarity Search
To find relevant chunks, we need to measure how similar the user’s query is to each chunk in our knowledge base. We do this using cosine similarity, which measures the angle between two vectors in high-dimensional space.
The cosine similarity formula is:

Where A · B is the dot product of the vectors, and ||A|| and ||B|| are their magnitudes. The result ranges from -1 to 1, where:
- 1 means the vectors point in exactly the same direction (highly similar)
- 0 means they’re perpendicular (orthogonal/unrelated)
- -1 means they point in opposite directions (completely different)
For text embeddings, values typically range from 0 to 1, with higher values indicating greater semantic similarity.
You can learn more about this on this great post by Tiger Data.
Let’s implement it:
import numpy as np

def cosine_similarity(vec1, vec2):
    """Calculate cosine similarity between two vectors"""
    dot_product = np.dot(vec1, vec2)      # A·B (numerator)
    norm1 = np.linalg.norm(vec1)          # ||A||
    norm2 = np.linalg.norm(vec2)          # ||B||

    return dot_product / (norm1 * norm2)  # Final formula
We can test it by calculating the distance between 2 vectors in our embeddings:
distance = cosine_similarity(
    CHUNKS_WITH_METADATA[30]['embedding'],
    CHUNKS_WITH_METADATA[31]['embedding']
)
print(f"The cosine similarity between the 2 vectors is {distance}")
The cosine similarity between the 2 vectors is 0.7192152488037815
That result means that the vectors are somewhat-related. Lets take a look at both:
print(CHUNKS_WITH_METADATA[30]['content'])
print(CHUNKS_WITH_METADATA[31]['content'])
The biggest wildcat today is the Siberian Tiger. It can be more than 12 feet (3.6 m) long (about the size of a small car) and weigh up to 700 pounds (317 kg).
The smallest wildcat today is the Black-footed cat. The females are less than 20 inches (50 cm) long and can weigh as little as 2.5 lbs. (1.2 kg).
Both chunks talk about species of cats and their size/weight.
We can now go ahead and build a search function:
def search_chunks(query, top_k=3):
    """Find the most relevant chunks for a given query"""
    query_embedding = embed_query(query)

    similarities = []
    for chunk_data in CHUNKS_WITH_METADATA:
        similarity = cosine_similarity(query_embedding, chunk_data['embedding'])
        similarities.append({
            'content': chunk_data['content'],
            'embedding': chunk_data['embedding'],
            'metadata': chunk_data['metadata'],
            'similarity_score': similarity
        })

    # Sort by similarity score and return top_k results
    similarities.sort(key=lambda x: x['similarity_score'], reverse=True)

    return similarities[:top_k]
Let’s test it:
user_query = "How long do cats sleep?"
results = search_chunks(user_query, top_k=3)

for i, result in enumerate(results):
    print(f"Result {i+1} (similarity: {result['similarity_score']:.4f}):")
    print(f"Content: {result['content']}")
    print("---")
Let’s see its results:
Result 1 (similarity: 0.6429):
Content: Cats sleep 16 to 18 hours per day. When cats are asleep, they are still alert to incoming stimuli. If you poke the tail of a sleeping cat, it will respond accordingly.
---
Result 2 (similarity: 0.6015):
Content: On average, cats spend 2/3 of every day sleeping. That means a nine-year-old cat has been awake for only three years of its life.
---
Result 3 (similarity: 0.4885):
Content: Cats spend nearly 1/3 of their waking hours cleaning themselves.
---
We can see that the results are related to the original query, meaning that our retrieval function is working.
If we want to see this visually, we can create a new figure to show how the query looks like in 3D and where do the retrieved chunks relate to it.
import numpy as np
import plotly.express as px
from sklearn.decomposition import PCA

def plot_search_results_and_query_in_3D(query, results, all_embeddings):
    """Creates and displays a figure that includes the user query and the search results"""
    # all_texts will be used to store all texts for displaying
    all_texts = []
    all_texts.append(query) # adding user query as first element in the list

    # result_texts will be used to store the texts from the results
    result_texts = []

    # adding results to all_texts
    for result in results:
      all_texts.append(result['content'])
      result_texts.append(result['content'])

    # lets add the rest of the text from the chunks but removing the results
    for embedding in all_embeddings:
      if embedding['content'] not in all_texts:
        all_texts.append(embedding['content'])

    # lets calculate the embedding for the user query
    query_embedding = embed_query(query)

    # all_vectors will be used to store all vectors
    # stack query embedding, result embeddings, and the rest of the embeddings directly
    all_vectors = np.vstack([
        np.array(query_embedding),
        np.array([result['embedding'] for result in results]),
        np.array([embedding['embedding'] for embedding in all_embeddings if embedding['content'] not in result_texts])
    ])

    # Apply PCA to reduce to 3D
    pca = PCA(n_components=3, random_state=42)
    vectors_3D = pca.fit_transform(all_vectors)

    # first index is the user query, then the results then the rest of the embeddings
    labels = ['User query'] + ['Results']* len(result_texts) + ['Other embeddings'] * (len(all_texts) - (len(result_texts) +1))
    # change size for the user query (biggest) and search results
    sizes = [12] + [8]* len(result_texts) + [5] * (len(all_texts) - (len(result_texts) +1))
    # change color for the user query and the search results

    # Create 3D plot
    fig = px.scatter_3d(
        x=vectors_3D[:, 0],
        y=vectors_3D[:, 1],
        z=vectors_3D[:, 2],
        size=sizes,
        color=labels,
        color_discrete_map={'User query': 'green', 'Results': 'blue', 'Other embeddings': 'red'},
        hover_name=all_texts
    )

    fig.show()
Let’s see how it looks like.
Context Assembly
Now that we have retrieved the most relevant chunks, we need to format them properly for the LLM. This step is crucial because how we present the information significantly impacts the quality of the final response. Let’s build a function to do so:
def assemble_context(results, max_context_length=10000):
    """Format retrieved chunks into context for the LLM"""
    context_parts = []
    current_length = 0

    for i, result in enumerate(results):
        chunk_text = f"Source {i+1}: {result['content']}"

        # Check if adding this chunk would exceed our limit
        if current_length + len(chunk_text) > max_context_length:
            break

        context_parts.append(chunk_text)
        current_length += len(chunk_text)

    return "\n\n".join(context_parts)
There are a couple of key considerations for this implementation:
- Length management: LLMs have context limits, so we need to be selective
- Source chunk identification: Numbering sources helps the LLM reference them in responses, and can be useful if you want to highlight them in your UI
- Clear separation: Using double newlines makes it easier for the LLM to distinguish between chunks
Response Generation
Finally, we combine everything to generate a response using an LLM. I’ll be using OpenAI’s gpt-4.1 for this.
LLM="gpt-4.1"

def generate_response(query, context):
    """Generate a response using the LLM with retrieved context"""

    prompt = f"""You are a helpful assistant that answers questions based on the provided context.
Use the context below to answer the user's question. If the context doesn't contain relevant information, say so clearly.

Context:
{context}

Question: {query}

Answer:"""

    response = client.chat.completions.create(
        model=LLM,
        messages=[
            {"role": "user", "content": prompt}
        ],
        temperature=0.1  # Low temperature for more focused responses
    )

    return response.choices[0].message.content
Now let’s put it all together in a complete RAG function:
def rag_query(question, top_k=3):
    """Complete RAG pipeline: retrieve relevant chunks and generate response"""

    print(f"Processing question: {question}")

    # Step 1: Retrieve relevant chunks
    results = search_chunks(question, top_k=top_k)

    print(f"Retrieved {len(results)} relevant chunks")

    # Step 2: Assemble context
    context = assemble_context(results)

    # Step 3: Generate response
    response = generate_response(question, context)

    return {
        'question': question,
        'response': response,
        'retrieved_chunks': results,
        'context_used': context
    }
We finally have the full RAG complete! Let’s test it:
# Test the complete RAG system
result = rag_query("How long do cats sleep and why?", top_k=3)

print("Question:", result['question'])
print("\nResponse:", result['response'])
print("\nSources used:")
for i, chunk in enumerate(result['retrieved_chunks']):
    print(f"  {i+1}. {chunk['content']} (similarity: {chunk['similarity_score']:.4f})")
The output is:
Processing question: How long do cats sleep and why?
Retrieved 3 relevant chunks
Question: How long do cats sleep and why?

Response: Cats sleep 16 to 18 hours per day, which is about 2/3 of every day. One reason kittens sleep so much is because a growth hormone is released only during sleep.

Sources used:
  1. Cats sleep 16 to 18 hours per day. When cats are asleep, they are still alert to incoming stimuli. If you poke the tail of a sleeping cat, it will respond accordingly. (similarity: 0.6322)
  2. On average, cats spend 2/3 of every day sleeping. That means a nine-year-old cat has been awake for only three years of its life. (similarity: 0.6177)
  3. One reason that kittens sleep so much is because a growth hormone is released only during sleep. (similarity: 0.5073)
Our RAG system is working! It retrieved relevant chunks and the LLM used those to generate a response.
What We’ve Built
We now have a working RAG system that can:
- Load and chunk documents (naive chunking for this demo)
- Create semantic embeddings using OpenAI’s embedding model
- Search for relevant information using cosine similarity
- Generate contextual responses using an LLM
- Visualize how embeddings cluster in 3D space
Current Limitations:
- In-memory storage (doesn’t scale beyond a few thousand chunks)
- Naive chunking strategy (fine for line-separated facts, poor for real documents)
- No hybrid search (misses exact keyword matches)
- No metadata filtering
- Basic context assembly (no ranking beyond similarity scores)
- No evaluation mechanism
Coming in the Next Posts:
- Advanced chunking strategies (recursive, semantic, contextual)
- Vector databases for production scale
- Hybrid search combining semantic + keyword matching
- Evaluation frameworks to measure and improve performance
- Production considerations (error handling, monitoring, optimization)